
Image Classification Made Simple: A Step-by-Step Guide Using CNNs


Introduction
Have you ever wondered how your smartphone can instantly recognize a face in a photo or how self-driving cars can distinguish a stop sign from a billboard? The answer lies in a fascinating field of artificial intelligence known as image classification. It’s the process of teaching computers to look at an image and tell us what it depicts. While this might sound complex, the fundamental concepts are surprisingly intuitive. We will explore this topic using Convolutional Neural Networks (CNNs), a powerful type of deep learning model that has revolutionized how we process visual data.
The goal of image classification is to assign a label to an entire image. A simple example is a model that can look at a picture and classify it as a "cat" or "dog." This is just one of many ways that deep learning is being used to make computers smarter. In fact, a 2024 study showed that CNNs achieved an accuracy of over 99% in classifying American Sign Language (ASL) hand postures, demonstrating their incredible potential. But how do these networks actually work? Let's break down the process.
The Power of CNNs: How They "See"
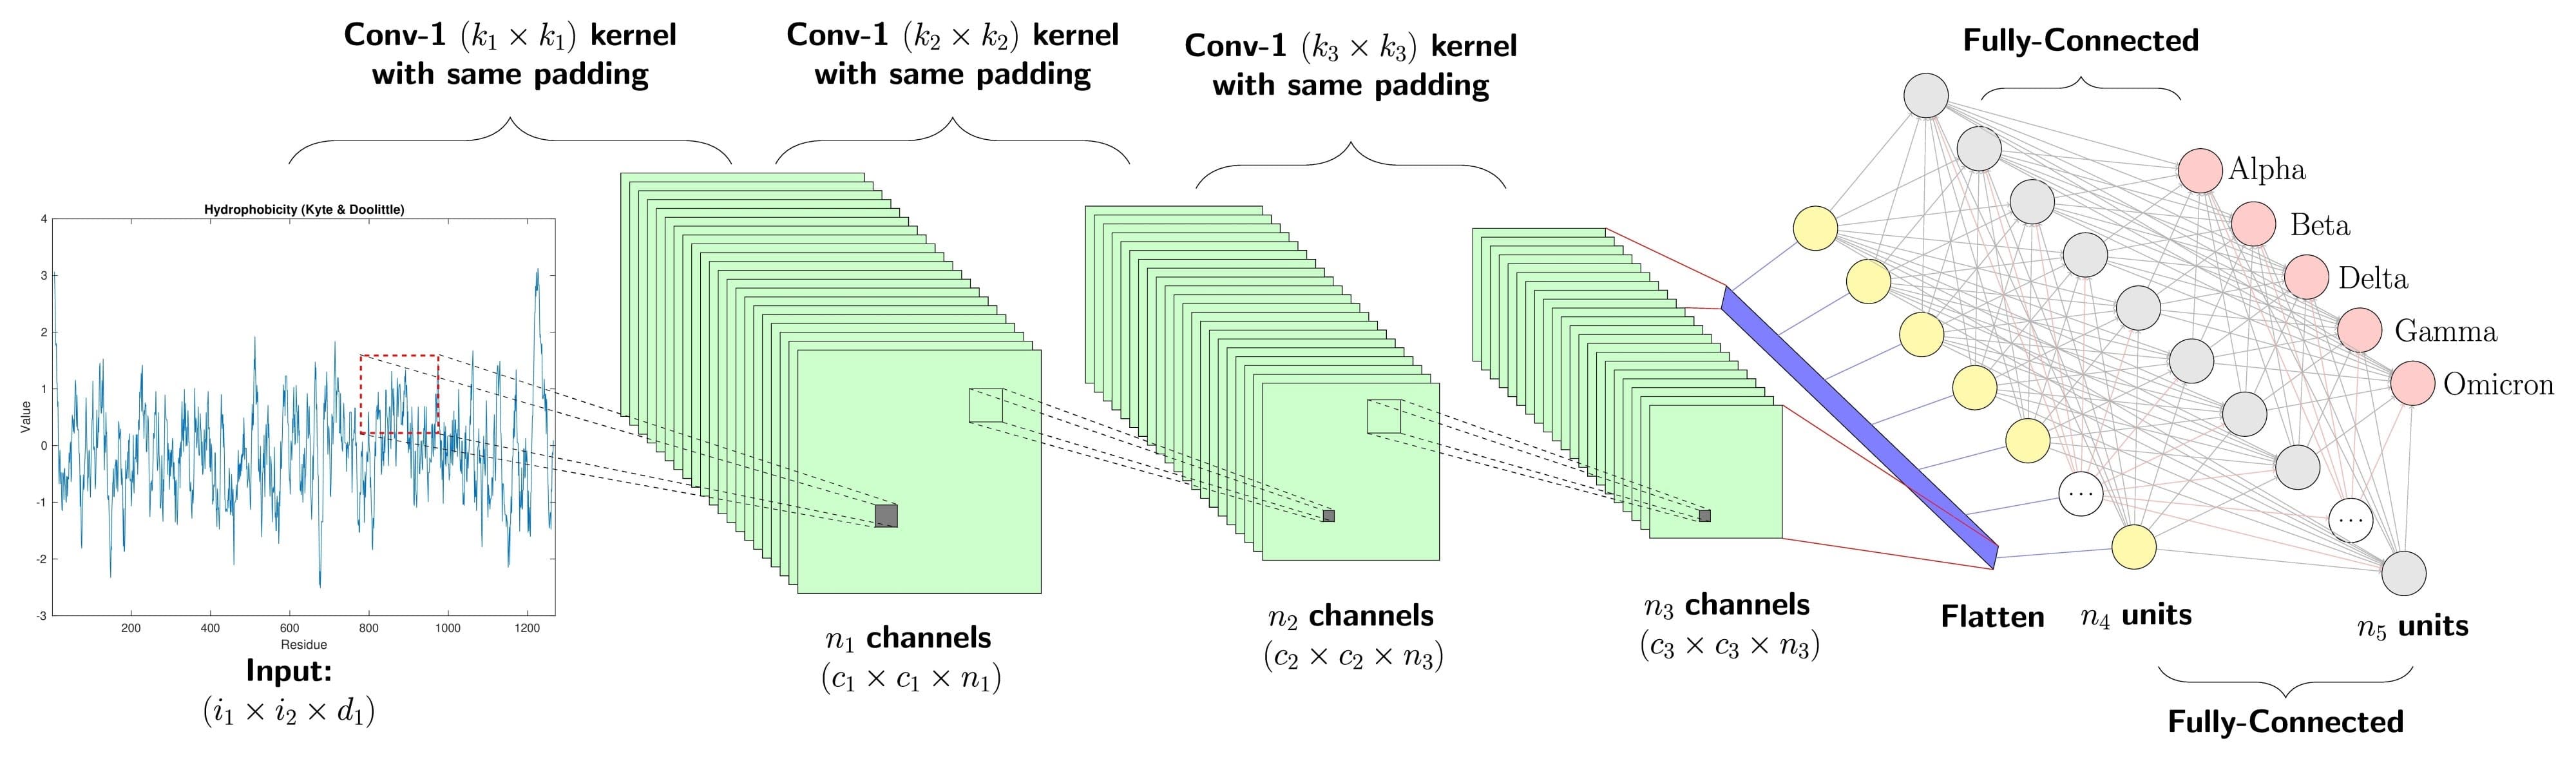
Traditional machine learning models struggle with images because they treat each pixel as an independent feature. This approach ignores the spatial relationships between pixels, which is crucial for recognizing shapes and objects. Convolutional Neural Networks solve this problem by leveraging a special architecture designed specifically for visual data. The name "convolutional" comes from the convolutional layer, the heart of a CNN.
Imagine a small window, or "filter," sliding over an image. This filter multiplies its values with the pixel values it's currently on, and sums them up. The result is a single number in a new matrix called a "feature map." This process is repeated across the entire image. Each filter is designed to detect a specific feature, like an edge, a corner, or a texture. The network learns what these filters should be to best represent the features of the images it's training on.
After the convolutional layer, a pooling layer is often used. This layer reduces the size of the feature maps, making the model more computationally efficient. It does this by taking the maximum value (max pooling) or the average value (average pooling) from small sections of the feature map. This step helps the network focus on the most important features, while ignoring less relevant details. This is what gives a CNN a crucial property called translation invariance, meaning it can recognize an object regardless of where it is in the image.
The final part of a CNN is the fully connected layer. This layer takes the flattened feature map and uses it to make the final classification. It's similar to a traditional neural network layer, where every neuron is connected to every neuron in the previous layer. This is where the model finally learns to map the extracted features to a specific class label.
A Step-by-Step Guide to Building Your Own CNN
Ready to build your first image classification model? You can use popular Python libraries like TensorFlow and Keras to make the process straightforward.
Step 1: Choose and Prepare Your Dataset
To get started, you'll need a dataset of labeled images. The MNIST dataset, which contains thousands of handwritten digits, is a classic choice for beginners. For a more challenging project, the CIFAR-10 dataset contains 60,000 color images in 10 different categories like "airplanes," "dogs," and "trucks."
Once you have your data, you'll need to preprocess it. This usually involves resizing all images to a consistent size and normalizing the pixel values. Normalization scales the pixel values from a range of 0-255 to a more manageable range of 0-1, which helps the model learn more effectively.
Step 2: Build the CNN Model
Using a library like Keras, you can build a CNN model with just a few lines of code. You'll stack the different layers we just discussed. A typical model will have a series of convolutional and pooling layers, followed by one or more fully connected layers.
from tensorflow.keras.models import Sequential
from tensorflow.keras.layers import Conv2D, MaxPooling2D, Flatten, Dense
model = Sequential([
Conv2D(32, (3, 3), activation='relu', input_shape=(32, 32, 3)),
MaxPooling2D((2, 2)),
Conv2D(64, (3, 3), activation='relu'),
MaxPooling2D((2, 2)),
Flatten(),
Dense(64, activation='relu'),
Dense(10, activation='softmax')
])
The code above creates a simple CNN. The first layer is a Conv2D layer with 32 filters, followed by a MaxPooling2D layer. We then add another pair of convolutional and pooling layers. The Flatten layer converts the 2D feature map into a 1D vector. Finally, the two Dense layers make the final image classification. The last layer, with a softmax activation function, outputs a probability for each of the 10 classes in our example.
Step 3: Compile and Train the Model
Before you can train the model, you need to compile it. This means specifying the optimizer, loss function, and metrics. The optimizer controls how the model updates its weights. The loss function measures how good the model's predictions are. We can track accuracy to see how well our model is doing.
Once compiled, you can train the model by feeding it your preprocessed data. The model.fit() function in Keras handles this. During training, the model will iterate through the data, making predictions, calculating the error, and adjusting its weights to improve its performance. This is the core of the learning process.
Step 4: Evaluate the Model
After training, it's crucial to evaluate your model on a separate set of data that it has never seen before. This test set gives you an unbiased measure of how well your model performs. A high accuracy on the training data but a low accuracy on the test data could be a sign of overfitting, where the model has simply memorized the training examples rather than learning the underlying patterns.
The Future of Image Classification
Image recognition is not just for university students and researchers. It has countless real-world applications. In healthcare, it can help detect diseases from medical scans. In agriculture, it can identify crop diseases. The field of deep learning for image classification is constantly evolving, with new architectures and techniques being developed every day. Starting with a simple image classification model using Convolutional Neural Networks is your first step into this exciting and impactful field. So, why not give it a try? The code is waiting.
Summary
This blog post provides a comprehensive guide to image classification, focusing on Convolutional Neural Networks (CNNs). We began by defining image classification and introducing CNNs as the ideal tool for this task due to their ability to process spatial data. We then delved into the core components of a CNN—the convolutional, pooling, and fully connected layers—explaining how they work together to extract features and make predictions. The post also included a practical, step-by-step guide to building a CNN using Keras, from preparing a dataset to evaluating the final model. Finally, we touched upon the vast real-world applications of image classification, highlighting its importance in various industries and its role as a key area within deep learning.
CSE AI/ML Program at SITASRM Engineering and Research Institute (SERI)
The B.Tech CSE AI/ML program at SERI is designed to equip students with a robust understanding of modern AI and machine learning techniques, including image classification. The curriculum goes beyond theoretical knowledge by providing hands-on experience with industry-standard tools like TensorFlow and Keras. Students learn to build, train, and deploy models like the ones described in this blog post, preparing them for a career in a rapidly evolving field. By integrating projects and practical workshops, the program ensures students not only grasp the concepts of deep learning but also gain the problem-solving skills needed to innovate and contribute to advancements in artificial intelligence. This specialized course enables students to develop expertise in areas like computer vision and natural language processing, making them highly sought-after professionals in the tech industry.
Table Of Content
- Loading...